Early in 2020 I was looking for a car project and was searching for a early to mid 70's Capri. I ran into this running 74 Opel Manta ad on Racing Junk. I really wanted a Capri but, every time I looked at this ad I felt a challenge as you don't see Mantas very often. The car was in Aberdeen, MD....a long way from Mesa, AZ so going to look at the car was not happening as Covid-19 was hitting. I asked the owner, Jason, to send me lots of pictures. After quite a few phone calls, I pulled the trigger and used an Escrow service to make the money transfer (easy for both of us) and hired an auto haul service to deliver the car to me.
Originally, I was going to resto-mod a Capri using modern (2000ish) running gear, suspension etc. from a 4 cly BMW E36 or a RX 7/8 or Miata or ? Once I received the Manta, I figured the Miata was the way to go because of the after market parts, support and how inexpensive they are.
The car arrives and I take it around the block. Its the 70's all over again! Long clutch travel, noisy, smelly, sloppy steering and those analog switches. I miss those days.
Son & daughter in law test drive New grandson making his claim to the car
Soon after all the test drives, my son (RJ) and I start the process of documenting all the issues with the car and created a couple of videos of the engine running. The plan is to sell the Manta's front and rear suspension, running gear and anything else I won't be using. I was surprised by was how little rust was in the car, considering it came from the East Coast.
Within days of receiving the car, RJ and I disassembled the car, except for the body, chrome and glass. We started the process of finding and documenting the datum points, along with the center of the car.
I have never done something as challenging as this before, so this will be a big learning experience along with pushing my skillsets.
I purchased rear and front subframes from a wrecked NB Miata. The subframes were missing some parts but the control arms and knuckles were still intact, which will help us in understanding where the tires are going to hang. Another key was to use all of the mounting points for the suspension, shocks, steering rack as much a possible to minimize any changing any of the Miata geometry.
So now it gets real; figuring out how to put a independent rear suspension where there once lived a live axle.

Live Axle Independent
After numerous trails and errors, I realized the only way this Miata subframe would fit was to cut a BIG hole where the Live Axle once was, this included the frame. Not having done this before I searched the internet for ideas and best practices. I came up with a plan to support the rear of the car with auxiliary stands and welding in supports.
After that it was all about making room for the subframe and creating a frame to hold it in place. I went back to the wrecked NB Miata and cut out the rear frame area that interfaced with the subframe. Then I sectioned these frames so that I could insert and weld some 2x2 square tubing. By doing this I did not have to re-invent the frame studs and bolt hole that mounts the subframe.
Miata rear frame cut and section
2"x2" square tubing inserted into the sectioned Miata frame. Mock up of frame connecting the mid section to the rear of the car.
New frame tack welded and subframe in place to test fit and check for clearance.
Another view
A view from under the car and look.... the motor, trans and front subframe are just sitting there waiting patiently.
Mounting the shock top mount to the frame just like it was and in the same position as it was in the Miata. Now it's time to close up the holes.
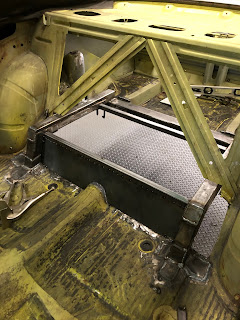
Starting the process of filling the holes and adding more bracing to the frame.
As you can see there is a big hole where the spare tire holder use to be. I took it out because when you look from the back of the car it looked goofy with this bulge hanging down.
In the process of filling the hole I recycled some of the metal I had cut out of the car as the piece already had the rounded shape.
Test fit of the Miata wheels and tires. they will probably need to go up about another inch, so I will need to do some work to the fenders. The plan is to try a fender roller, if that doesn't work, I will have to use some fender flares. More on that later.


 Starting the process of filling the holes and adding more bracing to the frame.


